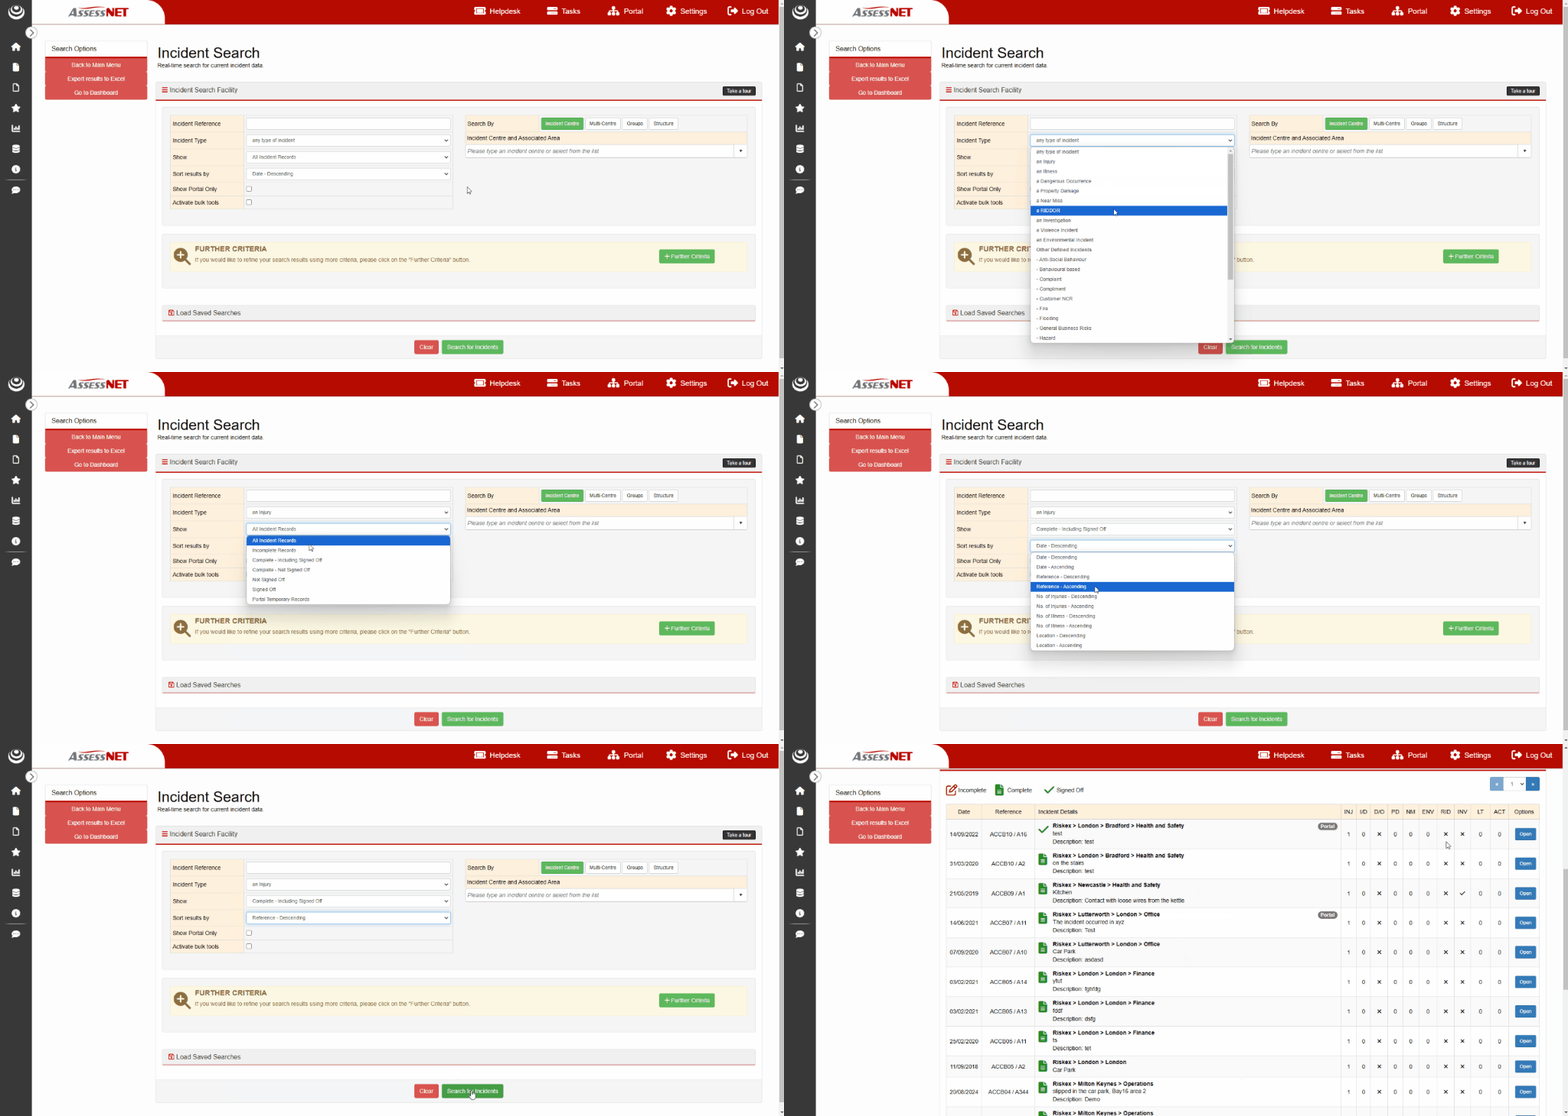
Searching for Incident Reports:
- Navigate to the Search Page
- Navigate to the module's homepage through the left sidebar.
- Then click on Search

- Filtering the Search
The Incident module provides 2 sets of filtering options, the initial criteria provided on the page, along with the further criteria modal that can be used for advanced searches.
- Incident Reference - Use this field if you have a specific incident reference number
Incident Type - Search for incidents that involve at least one event, such as injury.
Show - Select the status of records you want to view, such as complete without sign-off
Sort Results By - Choose how you'd like to order your search results.
Show Portal Only - Enable this option to view only records reported via the portal.
Bulk Tools - Activate this feature to transfer or delete multiple incidents simultaneously.
Search By - Filter results by specific organizational criteria, such as:
The Structure location of the report is tied to
- The incident centre the report is tied to
- The Incident group the report is tied to - filters based on incident centres within the group.
- Advanced Filtering
If you require further filtering options, you can click further criteria, a modal will appear.
- Incident Date - Set a date range based on when the incident occurred.
- Input Date - Set a date range based on when the report was entered into the system.
- Last Sign-off Date - Set a date range based on when the report was last signed off.
- Hard Copy Incident Book - Enter the hard copy book reference linked to the report.
- Keyword - Search for reports using keywords from the incident description.
- Entered By - Filter results by the user who entered the report.
- Lost Time Type - Filter by the type of time lost due to the incident.
- Total Time Lost - Set a range for the amount of time lost due to the incident.
- Classification - Filter reports based on the severity of the incident.
- Shift Pattern - Filter by the shift during which the incident occurred (AM or PM).
- ID Number - Find a report using the incident's unique ID number.
- Person Affected, Status, and Gender - Filter by the affected individual's details, including their status and gender.
- Hard Copy Reference - Retrieve a report using its hard copy reference number.
- Overall Risk Rating - Filter reports by the assigned risk rating.
- Root Cause Category/Finding - Filter incidents based on the identified root cause or findings.
- Using Bulk Tools
The bulk tools tickbox is found in the initial search box. This lets you select and perform actions on multiple reports at once, saving vast sums of time.
- Once bulk tools are active, when you search for records a tickbox will appear on the left, this indicates whether it will be affected by bulk tools
- Once you make a selection, you can either transfer the reports to another incident centre or delete them.
Was this article helpful?
That’s Great!
Thank you for your feedback
Sorry! We couldn't be helpful
Thank you for your feedback
Feedback sent
We appreciate your effort and will try to fix the article