Creating a COSHH Assessment:
- Navigation
- Go to the COSHH Assessment module by using the sidebar.
- Click on the Carry out a COSHH Assessment to get started

- Initial Information
- Sections - The assessment is split up into sections, Sections can be easily navigated through the left-hand breadcrumb trail. You can navigate through sections while completing an assessment. Whenever navigating to another section, all information is saved.

- Assessor - is the person who is conducting the Assessment, by default, it will be your account, but you may change it via the search menu.

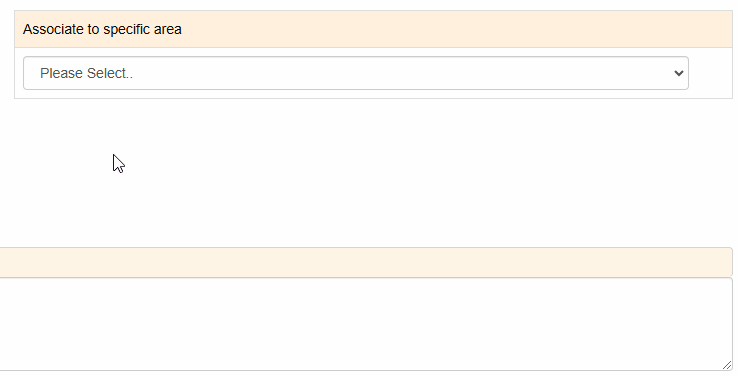
- Associate to specific area - This is the structure location the assessment will be tied to. It may go down up to 5 locations deep, with the next appearing after one has been selected.
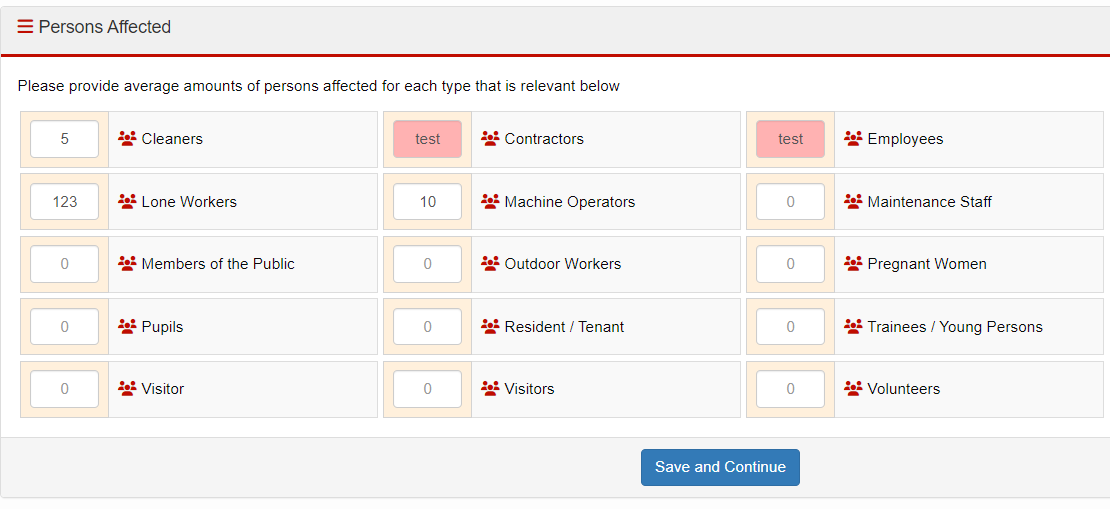
- Persons Affected- In this window, you will enter (or tick/select, depending on your system configuration) the average number of people affected by category, e.g. "5 Cleaners, 3 Visitors". If the input for any of these fields is invalid, it will become red and prevent you from continuing the assessment until it's fixed.
- Sections - The assessment is split up into sections, Sections can be easily navigated through the left-hand breadcrumb trail. You can navigate through sections while completing an assessment. Whenever navigating to another section, all information is saved.
- Substance Information
Here you will need to add substance relating to the COSHH Assessment, there must be at least one substance to continue.- First, you will be prompted to select a Safety Datasheet (SDS). If you are not using an SDS, select Manual Data Input. If you want to select a different SDS, click Use Another SDS in the top right.

- Substance Hazards - this allows you to include information relating to hazard labels, risk phrases and safety phrases. Additionally, you will be asked to select any warning labels necessary, you can only select CLP labels or CHIP, you may not select a mix. You click on the label to select/unselect it, with a corresponding green banner appearing.

- Risks and Precautions have preset statements to choose from, these are accessible via the black buttons at the top right of the label. Statements in use will appear in green.

- Usage Information - this stage requires the user to enter information on how the substance should be used, the duration and the frequency of the exposure.
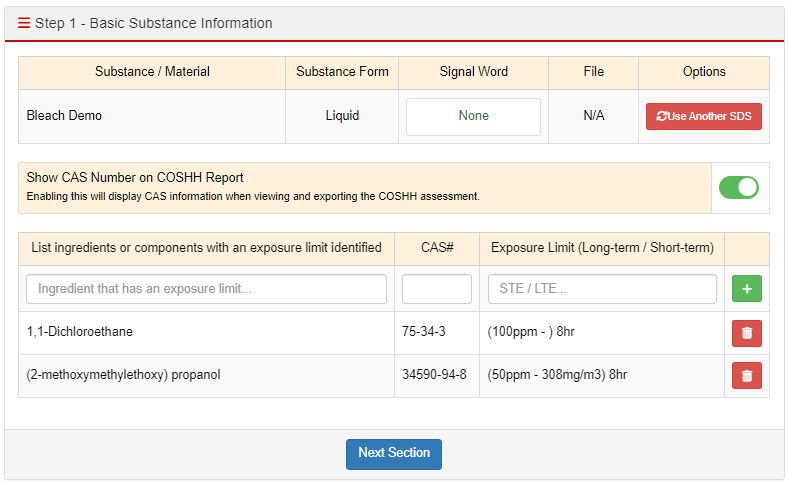
- First, you will be prompted to select a Safety Datasheet (SDS). If you are not using an SDS, select Manual Data Input. If you want to select a different SDS, click Use Another SDS in the top right.
- Risk Mitigation / Safety Procedures
The following sections all follow a generic format, containing text boxes to enter information about different aspects of risk mitigation or safety procedures.- Process Control
- PPE Required
- Storage, Spillage, Disposal and Transport
- Emergency First-Aid Procedures
- Fire Safety
- Health / Medical Surveillance
- Assessment of Risk
- Here, you will assess whether the risks have been appropriately controlled.
- You will enter the Likelihood and Severity of harm, which will be combined to form the overall risk rating.
- If hazards are listed as not adequately controlled, You can add actions for people to amend processes to minimise risk, they will be given a task within the system and notified.
- Review Details
Once all sections have been completed, you will have to fill out the review details of the assessment.- Assessment Visibility - if an assessment is private, only the reviewer, assessor and any selected users can view the assessment, with varying levels of permission. You will be able to add users via the searchable dropdown menu, and set their permission levels, whether they can view or edit or remove assessment.
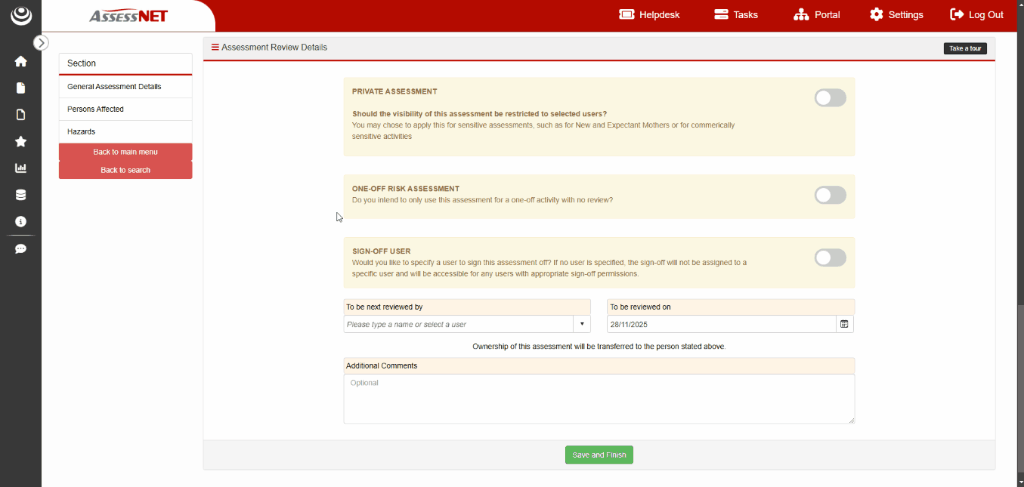
- One-off Assessment - whether an assessment is a repeated activity or if it doesn't need many reviews. If an assessment is repeated, you will need to set a reviewer and a review date.

- Sign off - if the assessment requires another user to review it and sign it off before it can be completed. A task will be generated for the reviewer.

- Assessment Visibility - if an assessment is private, only the reviewer, assessor and any selected users can view the assessment, with varying levels of permission. You will be able to add users via the searchable dropdown menu, and set their permission levels, whether they can view or edit or remove assessment.
- Summary Insights
- The Record Notes is a useful feature for documenting unique features of this assessment.

- Record Modification Trail- section automatically tracks and records updates of the record's information such as when the assessment is created, or edited and by whom.

- The Distribution List is a useful feature for notifying colleagues of an assessment.

- The Record Notes is a useful feature for documenting unique features of this assessment.
Was this article helpful?
That’s Great!
Thank you for your feedback
Sorry! We couldn't be helpful
Thank you for your feedback
Feedback sent
We appreciate your effort and will try to fix the article